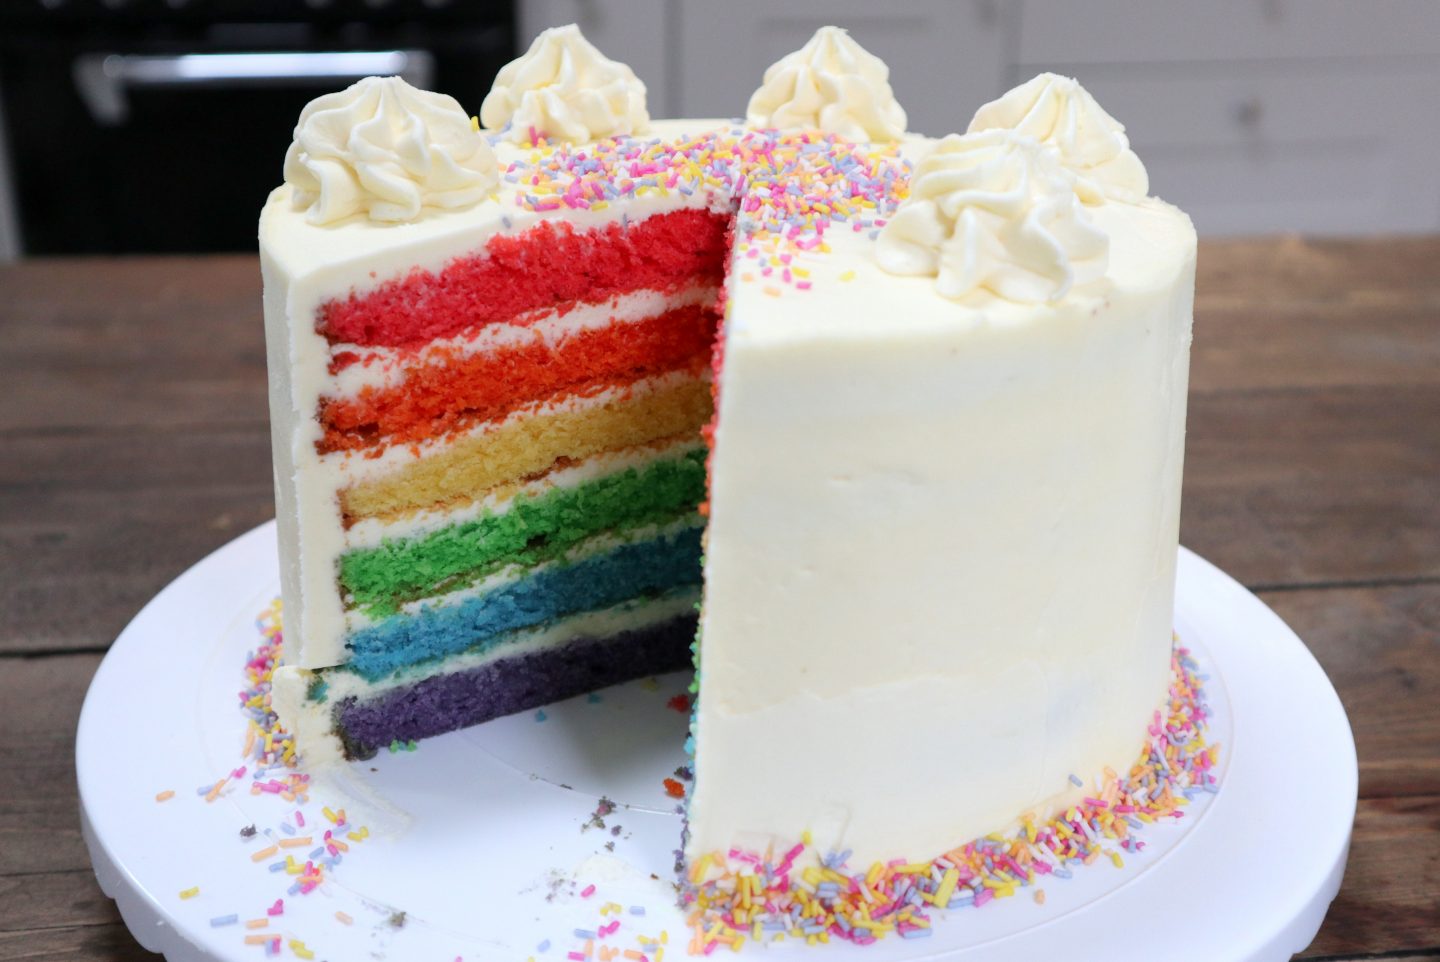
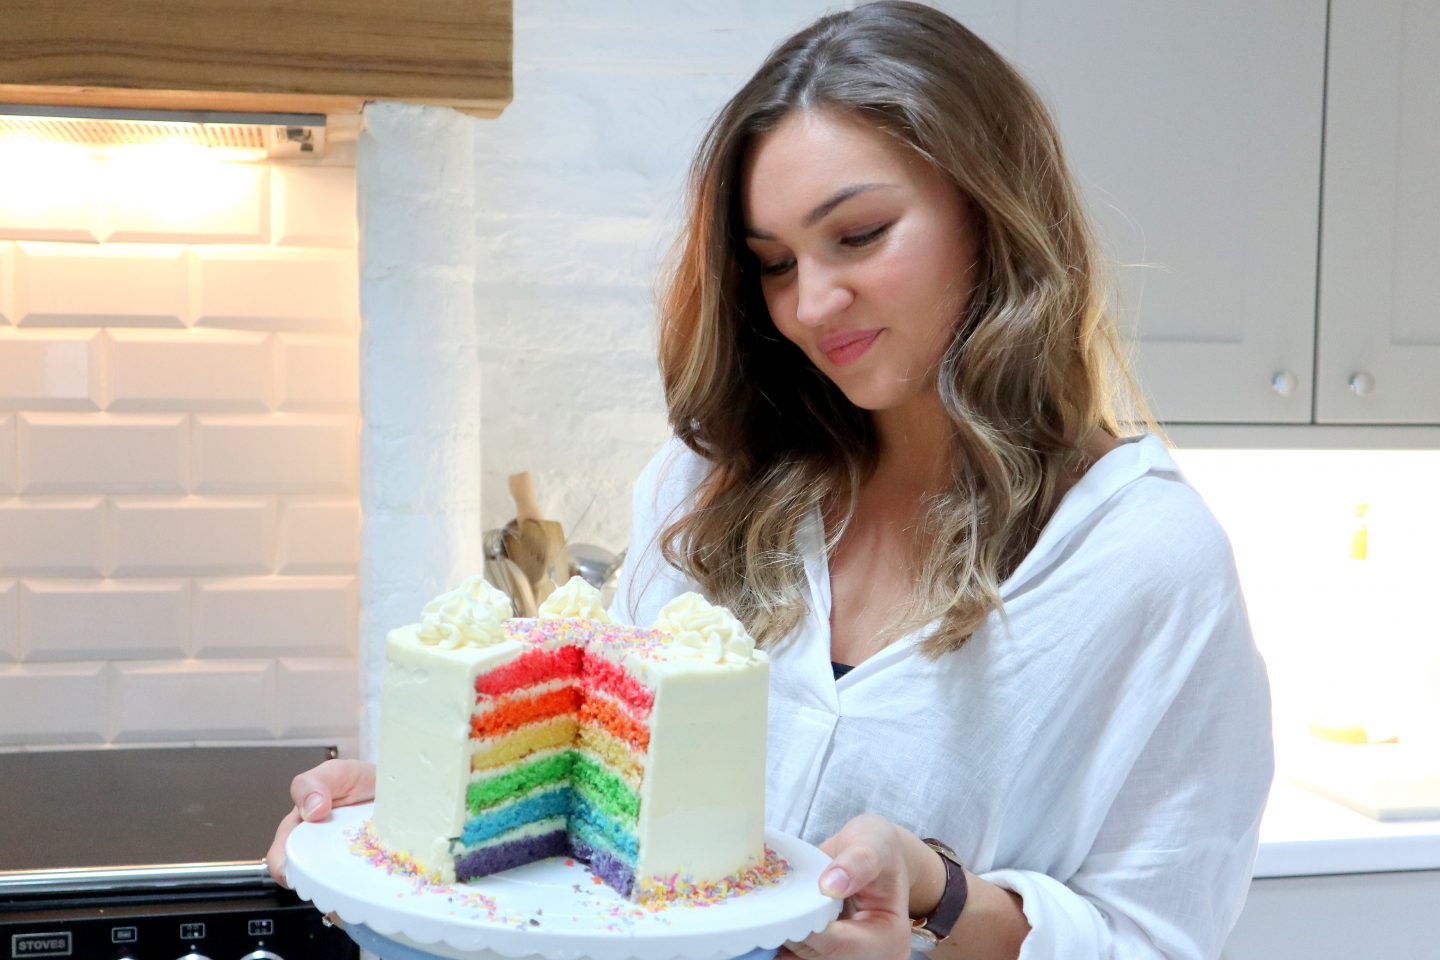
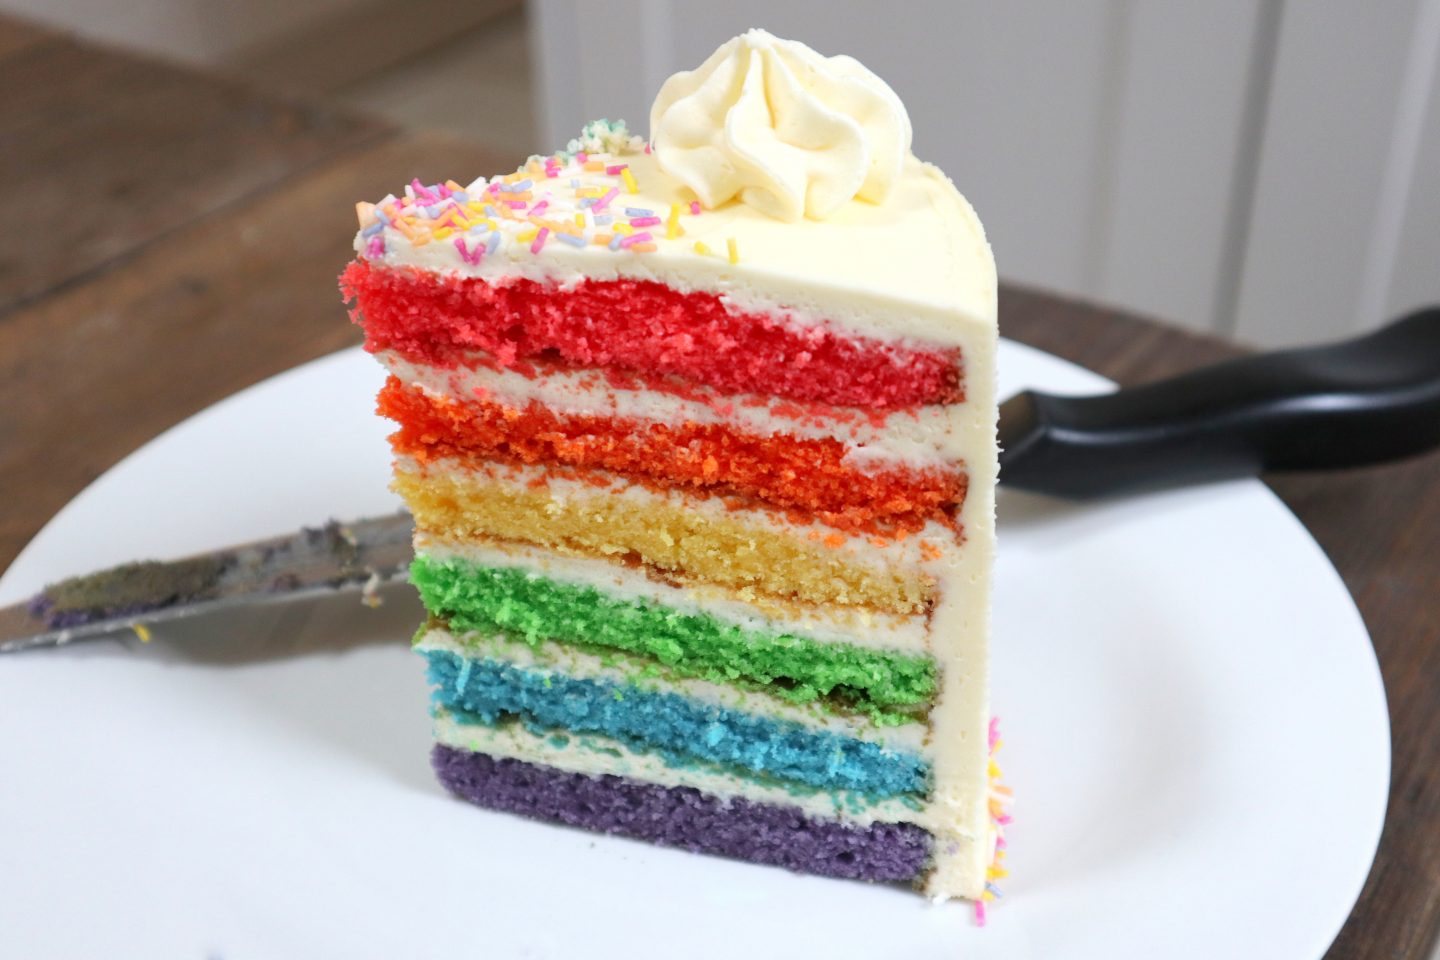
The ultimate celebration cake, with six colourful layers of moist delicious, gluten free sponge. What is not to love?! The simplest recipe for a coeliac friendly rainbow cake, coming your way. I made this for Dave for his birthday, and as a gluten eater, said he couldn’t taste the difference and that it was absolutely delicious. I am so pleased with how this recipe has come out, I think it might be my best cake to date!
INGREDIENTS
For the cake:
- 300g gluten free self-raising flour (I am using Doves Farm)
- 60g ground almonds
- 360g caster sugar
- 360g unsalted butter (softened)
- 6 eggs
- 2 teaspoons vanilla extract
- 2 tablespoons natural yoghurt
- 2 tablespoons milk
- Gel food colouring (purple, blue, green, yellow, orange, red) I am using the gels from Lakeland HERE.
For the buttercream & decoration:
- Approximately 800g butter (around 3.5 blocks)
- 1kg icing sugar
- a pot of sugar strands / hundreds and thousands for decorating (double check these are gluten free, you can buy these from most supermarkets)
You will also need…
- Round sandwich cake tins – preferably loose based and approx 20cm wide (I only have 2, so I bake and re-use until I have done all the layers)
- Greaseproof paper
- Piping bag, with large icing nozzle
Advisory:
- A cake spinner – For perfect decoration, I use spinner, this helps massively with icing the cake, but you can do this without.
- Scraper – I also use a scraper to smooth the buttercream and get a crisp finish.
- Stand mixer – this makes it easier to do batches like this but obviously you can do this with a handheld electric whisk instead.
METHOD
- Preheat the oven to 180C, Gas Mark 4. Take the loose bottomed base of your tin, and use it as a template to cut out six circles of greaseproof paper, these will line the base of the tin when doing each layer.
- Grease your sandwich tins (I am doing 2 at a time) and line the bases with 2 of the circles you have cut out.
- To make it easier, I make half of the batter at a time (so 3 sponges). If you have a very large stand mixer you may be able to create the full amount in one go, but for me, I have a regular stand mixer and doing it this way is much more achievable.
- Beat together 180g of butter with 180g of the sugar until light and fluffy and add 1 teaspoon of the vanilla extract. Beat again.
- Next crack 3 eggs into a bowl and whisk, before gradually adding to the mixture (a VERY small amount at a time, combining well between each addition) – this bit is key for getting a very light batter, whisk for longer than you would think!
- Once the egg is incorporated, add 150g of the gluten free flour and 30g of the ground almonds and combine to create a smooth batter (scrape the sides of your bowl in between mixing if necessary). Add 1 tablespoon of milk and 1 tablespoon of natural yoghurt and combine for a final time.
- Split the batter into 3. I just use a tablespoon and put a spoonful at a time into 3 bowls and try and get this as even as possible, you are welcome to weigh it for accuracy, but I just do it by eye.
- Next add your colours to each bowl, starting with purple, blue and green. Add a little food colouring at a time until you achieve your desired shade.
- Fill your two sandwich tins, one with the purple batter and one with the blue – spreading as evenly as possible. The batter will be thin, but this is fine as each of the layers will be quite thin individually. Put these into the oven for 12-15 minutes until when a skewer poked through the sponge, comes out clean.
- Put the green batter aside while you repeat the whole process to make the remaining 3 sponges – clean out your mixing bowl before starting again. Once the first 2 sponges are cooked and have cooled slightly, turn the cakes out onto a wire rack to cool fully and clean and re-grease and line the tins (with another 2 of the greaseproof paper circles).
- Repeat the whole process to create your yellow, orange and red sponges (I didn’t have an orange food colouring, so I mixed yellow and red together). Bake the yellow and green together, followed by the orange and red until you have 6 sponges cooling!
- While your sponges are cooling, make your buttercream icing. Whisk your butter for a minimum of 5 minutes, this will help it go lighter in colour and texture – to get that lovely pale frosting for the cake. Next add the icing sugar gradually, stopping and scraping the sides if necessary. Whisk very well to combine and achieve a light, fluffy and workable icing.
- When the sponges are 100% cold (do not ice a warm cake!), load up a piping bag with a large round tip and start by layering the sponges – begin with the purple and pipe circles onto the sponge (about three rings will do) you don’t need to cover the entire surface area as you then need to spread it into a thin layer, using a spatula or knife. NOTE: If you don’t have a piping bag you can apply the icing using a spatula free hand – I just prefer piping it on to get an even layer. Repeat the process to stack the sponges with butter cream between each layer, in this order; purple (bottom), blue, green, yellow, orange, red (top).
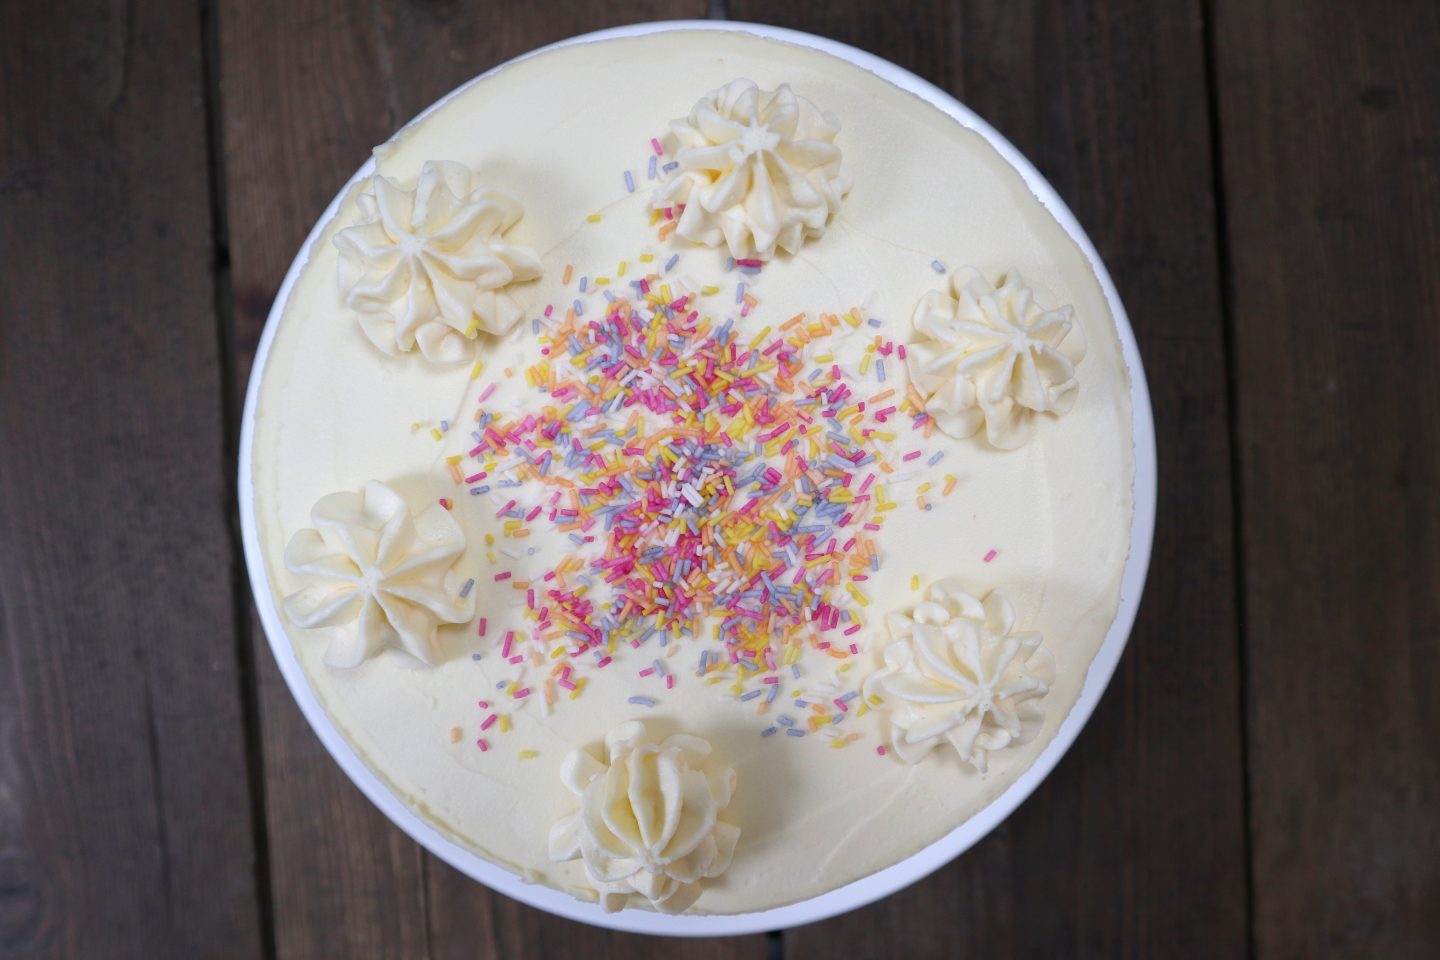
- Once you have stacked the sponges, you can ice the sides (before you do this, transfer it to a surface you are happy to serve / keep it on). Using the piping bag or a spatula, work around the cake to get a good even layer around the cake. Using the scraper and the turntable, I move the cake around to even out the sides, repeating the process to smooth the sides and filling in and re-smoothing as I go and smoothing the top too. Once you are happy with the appearance of the icing, clean up around the base and switch over your piping nozzle to a fluted one to get the additional decoration on the top, this part it optional – you can just top with sugar strands and you are good to go! Sprinkle with sugar strands wherever you like, I put mine in the centre on top and around the base.
- Slice & enjoy!

This has to be one of my favourite new cake recipes, I hope you too can impress your friends and family with this easy and ‘wouldn’t even know it was gluten free’ rainbow cake!
Let me know which recipes you would like to see next!
K
X
20 comments
I find when I make a large cake it starts to crumble from the centre when cutting. Do you have this problem?
Hi Jennifer, this is occasionally a problem (depending on the type of cake) but I find if you use a deep cake slice rather than a standard knife this really helps with a larger cake. I didn’t have too much trouble with this one! 🙂 hope that helps.
Hi there,
What are the sizes of the cake tins you use? Thanks
Can this cake be frozen so that it can be baked in advance?
I would advise doing it fresh to retain the moisture! Thanks! Katie
Can I omit the almond flour and just replace with GF flour due to nut allergy?
Thank you
Yes of course, that will still work 😀
Can I make this into a three layer cake?
Hi Lauren,
Yes you can! As the layers will be thicker however do allow them longer in the oven to cook. Just test the sponge with skewer when done. Alternatively, half the recipe and just do 3 layers 😀
I’m so looking forward to making this at the weekend! Is it possible to use xantham gum instead of the natural yoghurt – or is that not what the yoghurt is for? Quite new to gluten free baking so any help would be appreciated, thank you! 🙂
Hi Madeleine,
Thanks for your comment!
Great to hear you are interested in making this! I have to say it is one of my favourite bakes. You can use xanthum gum to help with texture, but this acts as more of a binder, the natural yoghurt is to keep the sponge moist longer – but it is optional, if you want to use a couple more tbsps of milk or dairy free milk this should work too. Any other questions just give me a shout! & if you do make this I would LOVE to see the end results – so tag me on @katielbucknell on Instagram 😀 thank you!! K x
Hi Katie!
Thank you for getting back to me so quickly – yes I can’t wait to make it, it looks absolutely perfect!
Thank you so much for explaining regarding the xantham gum and yoghurt, this makes a lot more sense to me now! 🙂
I think I will add in a few more tbsps of milk to use up what we have like you suggested, which will hopefully work, and I will definitely tag you once it’s done! I can’t wait to make it 😀
Thank you so much again! xx
Hi Katie, I’m looking forward to baking this beautiful cake for my little girl’s 4th bday in 2 weeks.
I only have 6 inches rainbow cake tins and am wondering if it would work? As I’m not very good at baking (don’t tell anyone!) I was wondering if you could help me out with measurements for the cake and icing, please?
Thank you so much! 🙂
Hi Nivia,
Amazing! Thanks so much for getting in touch. Yes they would absolutely work. Do tag me on social media and let me know how it works out for you!!
Thank you!
K
X
Hi do you have to use the ground almonds or can you leave them out or do you have to replace with anything else going to try and make this on the 18th for my daughters birthday
Hi Katie, thank you for sharing this amazing recipe! I have a question for you, is the oven meant to be fan assisted? I‘Ll make it in a week time I’ll let you know how it goes!!
Great recipi for my daughters 4th. I decided to use stork in place of butter and can’t really explain that. Busted my whisk and had top use a bit of pink food colouring for the icing. Ha ha aw dear
Brilliant! Thanks for making!! Glad you loved it!
Hi katie, I’ve been asked to make a gluten free rainbow cake for next week and came across your recipe. I’m having a practice run just to see how it turns out, once baked is it ok to freeze? Thank you
Hi Katie,
I’ve just made the layers and going to put icing on today. It’s for my daughters birthday in 6 days and really need to freeze it. Will it be ok or should I add Jam between the layers to keep it moist as well as buttercream? Thanks x